The Gates of Hell – Auguste Rodin
When I started thinking about my next project in april 2014, I had no idea that it was going to be for virtual reality.
At first, me and my Co-Director Dominik Stockhausen really wanted to create a scifi-horror short film that felt like Alien, the Abyss or Kubrick’s 2001: A Space Odyssey. These movies inspired not only us, but many generations of cinephiles that grew up with epic blockbuster movies.
Aside from our general affection for these classics and being inspired by visual arts (e.g. Auguste Rodin), something else fueled our imagination at the time.
The European Space Agency’s Rosetta spacecraft was about to rendezvous with the comet 67P after a ten years journey through our solar system. The images it sent back to earth were staggering.
The harsh sunlight on one side of the comet and the infinite darkness on the other were of such magnificent beauty, we could not think of a better setting for our short film. The smallest and most mysterious objects in space, drifting endlessly between worlds, could carry a horrific truth no one dares to imagine…
Farewell, Silver Screen!
We started storyboarding our first ideas in the beloved cinemascope aspect ratio and put together mood cuts using scenes from numerous movies. Quickly we had a rough story structure we would not dare to call “script” even to this day. Still, we were on the right track and quite confident that it was going to be awesome: High-contrast desaturated images, anamorphic flares and volumetric lights all over the place, but more importantly good cinematography, editing and music.
And then, one day our movie world turned 360 degree…
Original Storyboard in Cinemascope
It was no coincidence my brother Alexander Maas, who is also the composer of SONAR, brought the Oculus Rift DK1 along when he visited us at the Filmakademie. Weeks earlier, we both attended the student film festival Watersprite in Cambridge, UK, where we’ve been nominated for best animation and best score.
For hours we talked enthusiastically about the implications of virtual reality and how exciting it is going to be for our generation. When we got back, my brother did not hesitate to order a development kit.
A few weeks went by and strangely enough it never even occurred to me to use it on my next project. The reason for that is simple: It wasn’t me who had an Oculus lying around at home but my brother. So when he came to visit, I told him to bring the headset.
After testing some demos and enjoying Half Life 2 until motion sickness ruined the fun, we were so excited about the technology and how immersive it was, but we had no idea how to pull something off for VR. Without a solid background in real-time engines and programming, creating an experience even in Unity was going to be very hard. In fact, the technical challenges were so overwhelming, that we took some time to think about it and talked to our lecturers Verena Fels and Regina Welker at the Filmakademie about what we had in mind. They’ve been very supporting and immediately encouraged us to give it a try and see it as an experiment. Of course we really had nothing to lose and no matter what would come out of it, we would at least learn a lot. Also the prospect of being the first to do a virtual reality short film had something to do with our final decision, so we jumped on it.
Challenge accepted
Comet 67P – Image: ESA/Rosetta/NAVCAM, CC BY-SA IGO 3.0
A long week of R&D followed. Our goal was to create a passive experience with linear storytelling and not an interactive game.
The idea of “scripting” events in Unity and making sure everything performs in real-time scared us to death, so we had to do it within a conventional animation pipeline and pre-render the whole thing.
Still, it was not going to be straightforward. Starting with storyboarding we couldn’t really do it for VR and decided to go right into 3D layout. To review the shots we first created a camera rig in Maya with six quadratic cameras pointing in every direction and then doing playblasts one after the other.
Doing playblasts is not necessarily fast and we had to do it six times for many frames for every little change in every shot and then convert the sequences in After Effects to a cubemap before being able to comfortably edit in Premiere and review in VrPlayer.
We knew our final rendering format was going to be equirectangular so we simplified the whole process by using progressive rendering. We set the limit of progressive refinement to a very low number so the render-time per frame was about 1 second.
Everything was very noisy but we only had to deal with one image sequence per shot. For final rendering we would just have to increase the unified sampling and replace the footage in the final edit.
With our basic workflow defined, we could finally start focusing on concept design, cinematography and editing.
Exploring Virtual Reality
Reading the best practice guide from Oculus, we realized that it was very much focused on game development and did not really apply to VR filmmaking, so we had to rethinking self awareness and cinematography.
Early Animatic in Cubemap Format with Temp Music
We thought about having a static camera and a body so people don’t get motion sick and feel uncomfortable when looking down where they expect to see their legs. But character animation is very hard and time consuming even for conventional animated short films. Aside from that, having a body in a pre-rendered VR experience doesn’t make any real sense because it will never move the same way you do and it makes you feel even stranger to be inside a character you can’t control.
The whole notion of “being someone else” led us to believe, that it was best to leave the audience bodiless. They should be themselves and stay what they always were in cinema: Passive observers but more immersed than ever in a seamless 360 environment where they can decide where to look, which only adds to their sense of presence.
A static camera at 1.8m height will always feel like the POV (point of view) of a person. It also suggests whether you should sit or stand during an experience. That is especially true in stereoscopic 3D. Furthermore a static camera might be comfortable to watch and reduce motion sickness, but it is also very boring and feels like a rollercoaster ride of which we’ve seen way too many in VR, even to this day.
Moving the camera was most certainly the right thing to do but how and when was still to be determined. We tested different translation speeds and also experimented with rolling, tilting and panning the camera, trying to avoid the latter one as it is the most nauseating.
Directing Open Space
Right from the beginning, flying through an invisible wall into the interior of the droneship and finally through its front window into outer space again, helps to unmistakably tell the audience that they are not in control.
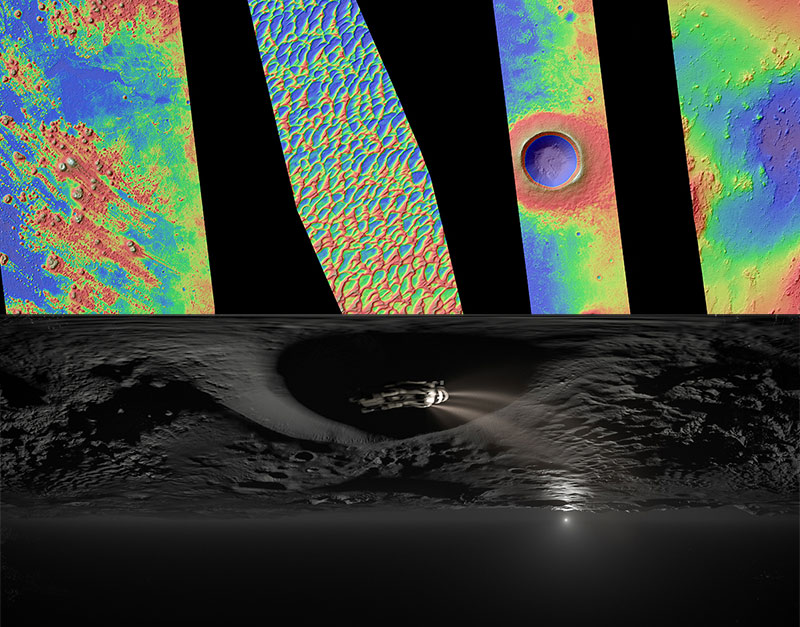
Surface created with real data based on Digital Terrain Models from Mars Image: NASA/JPL/University of Arizona
Also, as the scenery wraps around the viewer it should give them a hint that they are in a full 360 movie.
We built upon that in the second shot, by placing the asteroid just at the edge of the peripheral view to draw the viewer’s attention to the right.
By forcing the viewer to really look into the sky in the third shot, while closing in on the asteroid’s detailed surface, we leave him in a head position associated with amazement. As the gaze is naturally travelling to the left again we pick it up by the droneship movement and steer it to the right once more, revealing the composer’s credit.
After that, we are on the asteroid’s surface, closely watching the droneship as it suddenly descends into a dark cave beneath us. The asteroid draws us in, leaving us with little choice but to follow the droneship. The downward movement of the camera guides our view and we place the title of the movie right where it belongs: In the abyss.
Cinematic Virtual Reality
Directing is essential for cinematic VR.
Being in a 360 space doesn’t mean you can’t lose the audience’s immersion. There are many different ways to maintain a steady flow, some of them are subtle hints, some of them are deliberately forceful. We tried to use as many of those tricks as possible throughout the entire experience, not just in the beginning.
To induce a cinematic feeling something else is important – Story structure and timing of sequences:
Opening titles are still something you rarely see in VR and there is no clear answer to why not. Even for a short film and its no name crew it can make sense as it is merely a trick to make the audience believe they are experiencing something epic. By the time the opening sequence is over they are introduced to a new world and invested in the promise of a story, eagerly awaiting what comes next. Unfortunately most other experiences end right there. They do not take their time to let the audience settle in.
Not everything in VR has to be reinvented, although it is very popular to say so.
People keep arguing: you have no frame, you don’t know where people are looking, you should not move the camera and editing is disorienting.
Truth is, you can do whatever you want: You can edit and you can switch the point of view between shots, move the camera to make things more dynamic or even dramatic by deliberately inducing motion sickness where it needs to be. It is only a question at what pace and level, depending on how experienced your audience is with VR and also if it makes sense for the story. We showed the first edits of our movie to friends who had never seen anything in VR before. Naturally, they looked all over the place and they seemed to be very stressed and missed a lot of cues. We quickly became accustomed to VR and the speed of our edit. but we had to slow down most of the shots to make the experience comfortable for first timers.
It goes without saying that an epic orchestral score adds to the overall cinematic experience, just as the above mentioned opening titles do. Decades of moving pictures left us with a certain set of expectations and they will only change slowly as the medium evolves to something of its own.
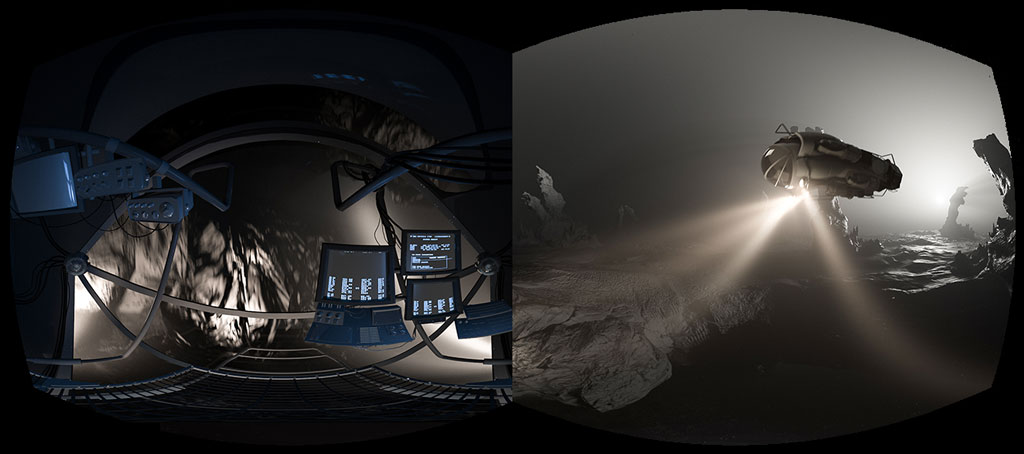
Hybrid Camera Concept Static POV Inside / Free Moving Camera Outside
By alternating between dynamic outside shots and the static POV inside the droneship, we can get the best of both worlds: A feeling of free exploration and discovery, but also a claustrophobic self awareness that is confined to the autonomously working droneship. We combine these concepts in the climax of the movie to maximize suspense.
There is also framing in VR. Your frame is your natural FOV (or FOV of your headset) at any given point in time. So if you know your audience is going to look in a certain direction you can create natural frames within your scenery. Obviously traditional composition rules and tricks apply for that fraction of your 360 space.
GearVR Update
We had to make a lot of creative and technical compromises and work very efficiently for the sake of our production schedule.
Our deadline was 31 of July 2014 when we presented the low res, monoscopic version in a crowded cinema. We hooked the DK1 up to the projector and had Sven Bergmann from the Institute of Animation volunteer to watch it through the headset while the audience very much enjoyed seeing what he experienced on the big screen.
Months later, in April 2015 we had the opportunity to show it on the exhibition floor at the FMX Conference in Stuttgart and we received awesome feedback.
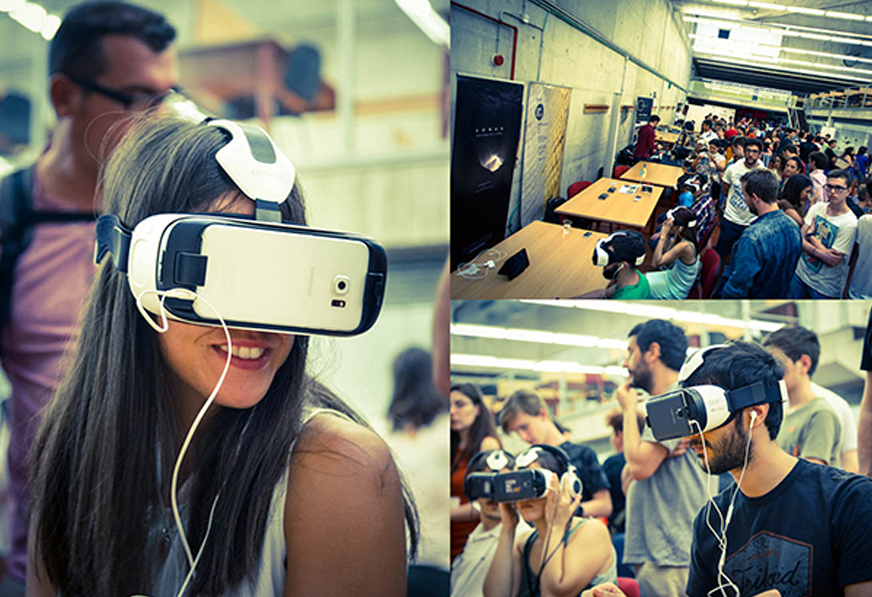
GearVR Premiere at Immersed Europe, Murcia, Spain
Around that time, I encouraged the Redshift developers to implement a stereo spherical camera as it is not possible to write your own extensions or shaders for their renderer yet. Arnold and Mental Ray on the other hand already had this feature.
Thankfully, they were interested and got it working in their newest build within a few days.
Obviously, we were quite excited about the new release and immediately talked to the Filmakademie’s Institute of Animation about updating the short film and re-render it at higher resolution, 60fps and stereoscopic 360 on their GPU farm.
They were happy to help and so we agreed on a cooperation with the R&D department, led by Prof. Volker Helzle.
It took me more than two months of testing, rendering, re-rendering, reading about UHD encoding etc. to get to the final version of the movie.
We had nine NVIDIA Kepler cards at our disposal to render more than 22000 frames in 4k.
Final remarks
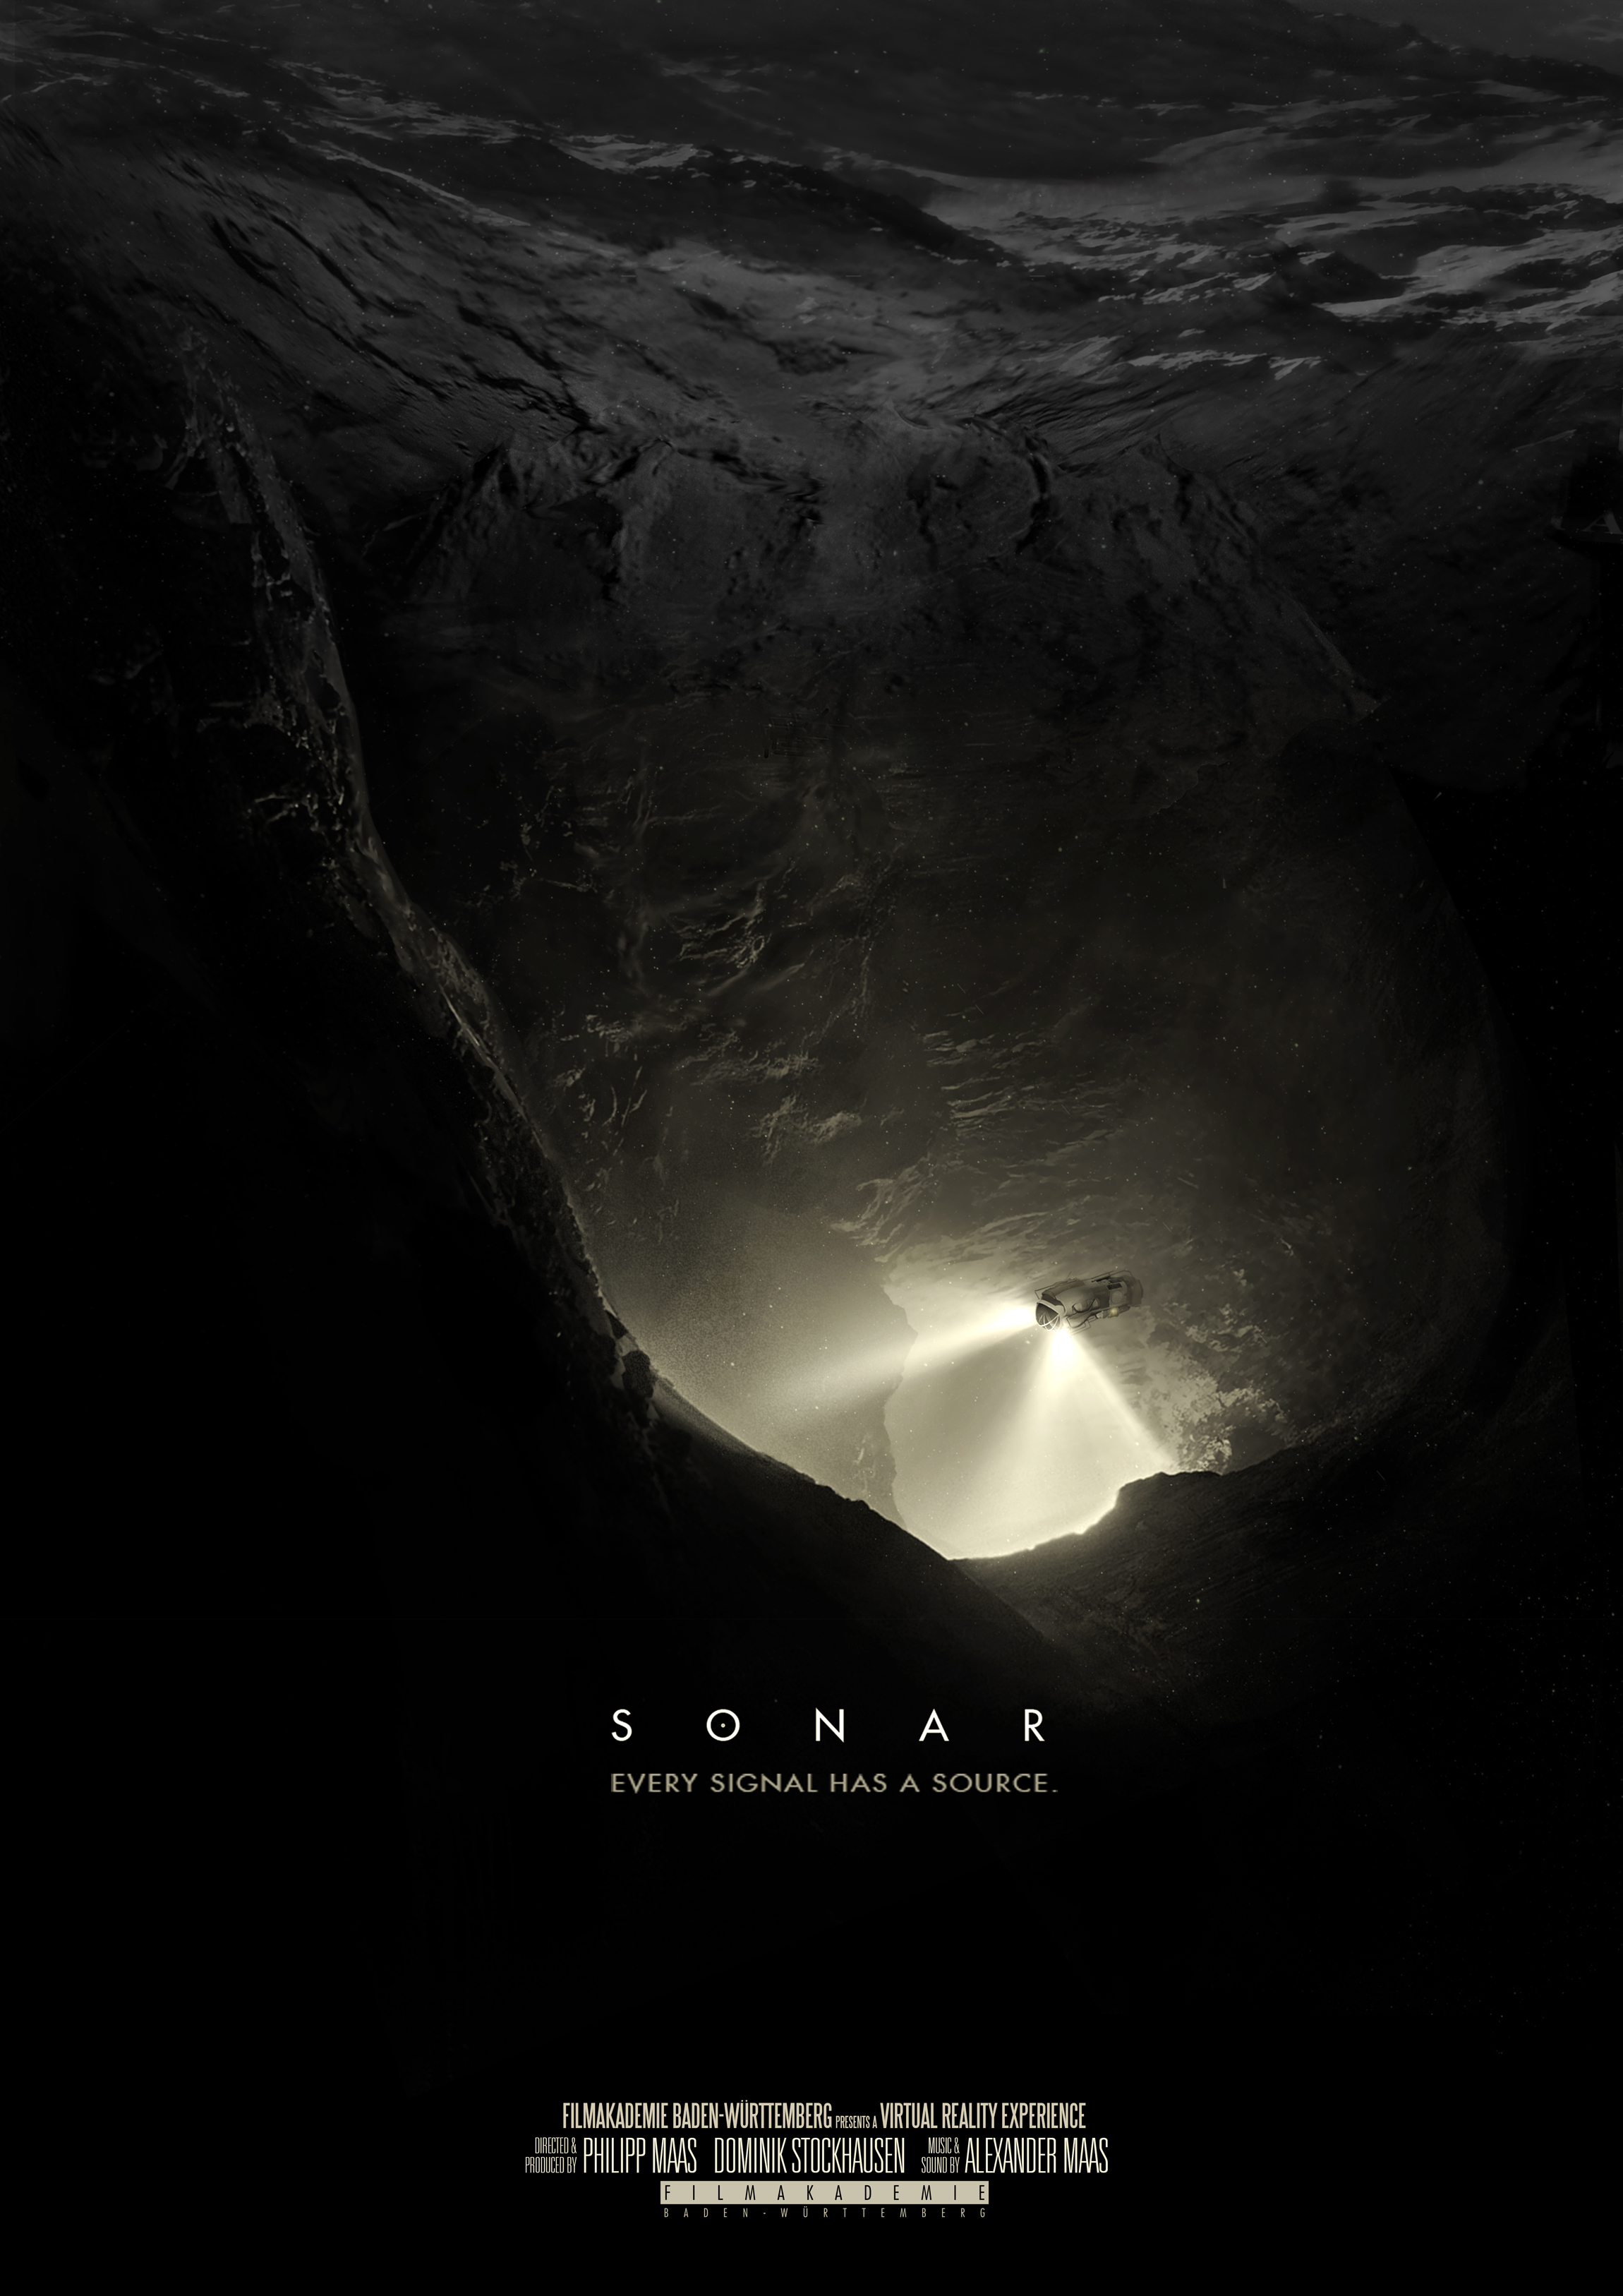
Illustration by Janina Putzker
The GearVR version was released and presented at Immersed Europe in Murcia, Spain in the beginning of September of 2015, while also getting a nice review by Road2VR.
One thing we noticed with the new version of the movie is that we lost some of the old school sci-fi feeling. Compared to 25fps and crappy resolution, 60fps in 4k feels hyperreal. Everything is incredibly smooth and you need so much more detail in your assets and also in your animation. Unfortunately, we didn’t change or improve anything in the shots for the update.
Although there will be a demand for experiences that are as close to reality and our natural vision as possible, the more exciting thing is to see places and artistic styles you cannot experience in the real world. That’s why we should not dismiss even simple things like film grain or zooming as not applicable to VR. We have to make conscious decisions about everything in virtual reality based on experimentation.
I think of VR as an exciting opportunity for a new generation of storytellers to redefine entertainment. There is no doubt VR and AR is going to succeed. How quickly remains to be seen. The most important thing, as they say, is content. But in order to have compelling and engaging content we need to invent a new interaction model to create and direct stories inside virtual reality. VR Space is inherently three dimensional and our computer screens are not. We need to look at and interact with pixels/voxels/light fields in a perfectly augmented or virtual world.
There is a lot of research to be done and many more software and hardware companies will emerge in the coming years to make content creation and distribution easier and improve quality and comfort.
Hopefully, SONAR can be an example for original storytelling in VR and helps in slowly defining a new digital medium.
Keep reading after the trailer for additional information on the making of the movie
Additional Resources
Moods / Design / Animatic
We intentionally chose the analogy of outer space and deep sea as the theme for our movie. We also watched documentaries about ancient caves. They provide a nice contrast between vast, cathedral like structures and narrow, claustrophobic sections and you can easily get lost.
Early Concepts
The droneship is supposed to resemble a submarine like vehicle with a distinct spherical cockpit. In contrast to the panoramic window, the inner frame of the cockpit gives us a vanishing point towards the front.
Testing our early animatics in Cubemap format, we noticed that VrPlayer’s cube map projection felt differently than a spherical projection. This is due to the virtual distance to the projection planes. It was possible to change the FOV (field of view), IPD (interpupillary distance) and virtual screen size and distance in the settings to our liking so we had to define some standards ourselves in order to reliably analyse our experience every time. To be able to precisely layout and stage for VR, for example the second display screen on the top-left of the cockpit, we need to wait on consumer HMD’s. Unfortunately they will all have slightly different lenses and FOV.
Environments
All the environments and models you see in the movie are sculpted and placed by hand. We mainly used Zbrush to create a total of 62 different kinds of rocks, walls, pillars, bodies, legs, hands etc. and then exported low-poly models with automatic UV’s and vector displacement maps to be used in Maya.
For the shot underneath the surface of the asteroid, we really wanted to push detail and make it as realistic as possible. Also we wanted the landscape to cast long shadows as the sun vanishes behind the horizon, which meant that we had to use displacement maps with very high resolution and tessellation.
We came up with a way to sculpt with real surface features from Mars. First, we downloaded digital terrain models (DTMS) from the HiRise website that are public domain and converted them with the command-line tool GDAL to GeoTiffs. You then need to remove the georeference TAG to be able to load the tiffs into Nuke or Photoshop. With GDAL you can also read the MAX and MIN elevation values and use them in a grade node to rescale the values to 0-1.
Assets & Environments
What you get is a regular height map that you can use as a very big alpha texture for your brush. Painting your own surface with craters and dunes that actually exist and have a geological history is great fun. (Download Brushes)
Also, seeing it in 3D on a shaded model is much more intuitive than doing it in Photoshop.
In the end we exported four different displacement maps in 8K for a simple plane that had multiple UV tiles.
For the human faces towards the end of the movie, we experimented with photogrammetry, which wasn’t very accurate, but it provided us with a good base to start sculpting. We wanted it to look rough and eroded anyway.
Lighting / Shading / FX
Our renderer of choice was Redshift for Maya and I cannot stress enough how fast and easy to use this piece of software is.
Fortunate for us, two weeks into the project, version 1.x was released and blessed us with volumetric lights.
Before that, we tried to add Mental Ray’s volume lights in comp, but compositing in 360 is difficult, especially in After Effects. Doing it in stereoscopic 360 is pretty much impossible.
As described earlier, the goal was to keep it simple and only have a single beauty pass and do nothing but denoise and overall color grading in comp.
I didn’t really expect it to work, but when I tried to render volumetric IES lights in Redshift and it gave me those beautiful cones of light, I danced with joy. The subtle variations in the headlights of the droneship really make up all the atmosphere in the image and give it much greater realism.
In terms of shading we kept it also very simple. We only used architectural or car paint shaders with displacement maps. For the environment assets we tried to get slightly different looks for every shot. We start with a very diffuse appearance resembling lunar soil and then get more glossy and obsidian like as we get closer to the core of the asteroid, where all the dead people reside.
Simulations were done in XSI Softimage and exported as alembic caches to Maya.
Stereoscopic 360 and 60fps
Stereoscopic 360 is hard to understand at first. It is not as simple as to put two panoramic cameras side by side and press render (or record). Eye separation is baked into every pixel when pre-rendering a stereoscopic 360 image, so it only works in the direction the cameras were facing at the time of rendering and eyes get slowly inverted as you steer your gaze towards the back of the image. (More resources: Paul Bourke, Pedro Fernando Gomez Fernandez , Andrew Hazelden ).
We tried to render vertical 1px slices, with a conventional stereo rig and rotate the camera one degree at a time, basically scanning the scene. But then we would have to stitch everything: 360 slices per frame and per eye. After a lot of tests, reducing the number of slices, warping images and some scripting to make the setup and workflow easier and faster to render, we came to realize that this won’t work. That’s why we decided to forget about stereoscopic 3D in the first place.
But fortunately, as I mentioned in the article above, Redshift implemented a stereo spherical camera model this year.
So for the GearVR update, all we had to do was to transfer all the project files, open up every scene and make sure everything still works, convert the animation to 60fps, stretch the alembic caches, stretch all motion graphic textures, set the output to the new resolution (3840x1536px) and turn on the stereo spherical switch in the camera settings.
Still it took more than two months of testing, rendering, re-rendering, reading about UHD encoding etc. to get to the final version of the movie.
We had 9 NVIDIA Kepler k20x cards at our disposal to render more than 22000 frames in 4k which adds up to roughly 350GB just for our master 16bit PNG sequence.
Output
When dealing with high resolution images, high contrasts and smooth gradients, there is no way around HEVC (High Efficiency Video Coding).
The new codec is developed specifically for UHD formats and therefore produces smaller compression artefacts and banding that can get very, very ugly in VR. For example on a compressed lat-long h.264 video you’ll get nasty stretching of the artefacts toward the poles. HEVC is still not perfect and hardware decoding is not widely available yet (as of 10/2015 e.g. Intel Skylake and Nvidia GTX 960) but it’s the best quality you can get to run on Samsung smartphones at 60fps in the above mentioned resolution.
We used TMPGenc Video Mastering Works 6 to encode it for the GearVR (GearVR _HEVC_TMPGEnc6_Preset)
Thank you!
I hope some of the information in this article is interesting and useful.